


In the name of God, praise be to God, prayer,
and peace be upon the Messenger of Allah

and peace be upon the Messenger of Allah

Peace, mercy, and blessings of God upon you,
You are welcome to the ninth lesson of the Server lessons playlist
I’m Mohamed El-NMR from (SystemAC)
the Blog & channel of systems administration
This lesson will be about the Database Server
You are welcome to the ninth lesson of the Server lessons playlist
I’m Mohamed El-NMR from (SystemAC)
the Blog & channel of systems administration
This lesson will be about the Database Server

Lesson content:
In this lesson, we will explain the following points
The first point: What is Database Server
The second point: How to make any server become a Database server
The third point: What are the most famous applications of Database Server
In practical: we will explain
1- How to install the Database server
2 - Creating a Database and user

Point 1: What is the DB Server?
It’s a server which introduces the service of databases.
And note that: Database is considered a set of tables that contain data inside,
This data may belong to an application or a website
This data may belong to an application or a website
Also, Database is the main tool where most applications
and websites nowadays depend on.
and websites nowadays depend on.

Point 2: How does any server become a DataBase server?
This can be done by installing any DataBase server application on.

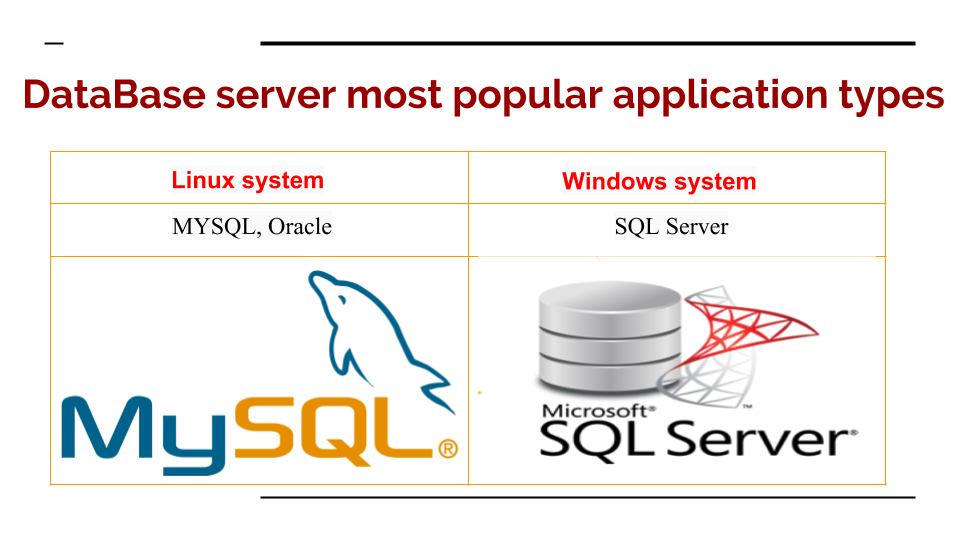
Point 3: DB server most popular application types:
In Linux system: there are MySQL, Oracle, and others
Whereas in windows system: there is the SQL server of Microsoft company
Now practical:
We will explain in it
The first point: How can we install the database server and
we will choose here SQL Server
we will choose here SQL Server
Second point: How to create a database and a user
and make this user the db_owner
and make this user the db_owner

No1 in practical: Installing the(SQL server 2008 R2 Express)
DataBase Server on
DataBase Server on
Windows Server 2008 R2

This step is divided into two stages
And now, The first stage Installing the SQL server DB Engine,
which carries the data and configurations of all databases
which carries the data and configurations of all databases

First thing: Open your browser on the server
Then in the Google search engine type:
Download SQL server 2008 r2
Download SQL server 2008 r2
You will then click on the first link as shown

Now this page will appear, click on Download

You will choose the SQL Express 86 as shown in this picture,
and we chose the 86 which is the 32 bit instead of the 64
because of the 32 works for devices that have a memory less than 3 GB,
but for those who have a device with a memory
higher than 3 GB can download the version 64
and we chose the 86 which is the 32 bit instead of the 64
because of the 32 works for devices that have a memory less than 3 GB,
but for those who have a device with a memory
higher than 3 GB can download the version 64
Then click Next

Now you will be directed to this page, and the word
"Thank you for downloading" will appear
"Thank you for downloading" will appear

The download will begin to appear with you depending on your browser

After downloading the program, we will install it by
clicking right-click on the program icon
clicking right-click on the program icon
Then select “Run as administrator”

You'll see this loading screen, let it complete

Now you will see this window, click on the first selection
New Installation or add features

We accept the terms here, then click Next

The loading will begin with you as pictured, let it complete

After the previous download is complete you will see
this screen and wait for a little
this screen and wait for a little

Now you will see this window
First thing: Make sure there is a right sign next to the
DB Engine Services
Because this is what we need to install
Second: From this box, you can change the path of the default folder
for the DataBase engine on the server
for the DataBase engine on the server
Or let it be on the default as it is
After that, click Next

Now the SQL server Instance configuration
Choose the second selection here “ named instance”
in order to write a name we want for this instance
Note here we can make more than one instance of the SQL DB server
on the same server so that each instance will be separate,
other than the other instances, although they are on the same server,
but here we will make one instance and we will write Its name as “SQLExpress”
as viewed here, and from this box, you can change the path of the folder
of this instance on your server machine or leave it as it is
Then click Next

Now you will see the services of the SQL server
Which we could control the SQL application thereby
Here you will find two services, the first and most important service
Is the SQL Server DB Engine that’s automatically activated
As for the second service, you will find it disabled as shown here
, and we do not need this service now
, and we do not need this service now
Then click Next

Now you will see the DB Engine Configuration
In the Authentication Mode
Select Mixed Mode, which means that you will be able to access the DB server
either through the Windows user or through the SQL server application user.
either through the Windows user or through the SQL server application user.
Then here you will see username sa, which is a default username
for the SQL server, DB application and have all the permissions on the database server,
and here write the password of this “sa” user and must be complicated
for the SQL server, DB application and have all the permissions on the database server,
and here write the password of this “sa” user and must be complicated
Next: Click on “Add Current User” to add the current Windows
user you have to make it able to access the SQL DB server,
and you will find that the username appears here with you as “Administrator”,
and then click Next.
user you have to make it able to access the SQL DB server,
and you will find that the username appears here with you as “Administrator”,
and then click Next.

The Error Reporting window will appear,
so you can put a sign next to it to activate this feature,
and send any error that happens with you
to Microsoft so they can examine it
and try to help, or Leave it on default without activation,
and then click Next
so you can put a sign next to it to activate this feature,
and send any error that happens with you
to Microsoft so they can examine it
and try to help, or Leave it on default without activation,
and then click Next

And now the installation will begin with you, let it be completed

After finished, you will see the Completed Installation statement
as shown, Now Click Close
as shown, Now Click Close

Now We will make sure the SQL program is installed correctly,
by pressing the Start button and then write the word SQL
and then press Enter from your keyboard and ensure that
these icons appear such as the SQL Server Configuration Manager and others
by pressing the Start button and then write the word SQL
and then press Enter from your keyboard and ensure that
these icons appear such as the SQL Server Configuration Manager and others

Now the second stage:
Installing the SQL Server Management Studio,
through which we can manage and control
the contents of the SQL engine DB Server
through which we can manage and control
the contents of the SQL engine DB Server

First, we will download the program, as we did earlier
we will write “Download SQL server 2008 r2” in the Google search
engine and then after showing the results will click on the first link as viewed here

Click on the word Download

Now we will choose SQL Management studio x86 as shown
Then click Next

The download will begin to appear with you depending on your browser on the server

After downloading the program, we will install it,
by right-clicking on it and choose Run as administrator
by right-clicking on it and choose Run as administrator

You will also see this window let it be completed

You will now wait a little bit to convert you to the next screen

Make sure you are on the Installation tab from the left
Then click on the first option,
New Installation or add features
New Installation or add features

Also, you will wait for a while to enter the next stage

Select the first option, New Installation or add features
It will show you the instance name of the installed SQL server
that we’ve installed before on this server and you want to manage & control
which is called “SQLExpress”
that we’ve installed before on this server and you want to manage & control
which is called “SQLExpress”
Then click Next

Now accept the terms, then click Next

Here in the Instance Features make assure that there is a mark
on the management tools in order to install it, After that click Next
on the management tools in order to install it, After that click Next

Also here in error reports, you can leave it
as it is without activation, then click Next
as it is without activation, then click Next

The installation will start with you as shown in the picture so let it complete

After the download is complete and the word
SQL server Installation Completed Successfully appears
SQL server Installation Completed Successfully appears
Click Close

Now you can close this window as well

Open the program by pressing the Start button and then typing SQL management
and you will see the program icon above
and you will see the program icon above

Now you will see the login window, with three fields, server type, server name and Authentication
, In Server Type, we will choose “Database Engine”
In the server name, we let the default name, which means that it will enter the same server as we are. Then, it will enter the instance SQLExpress that we installed
In the authentication or (login method) we’ll select the Windows Authentication. This means that the current Windows user ”Administrator” will be used to access this SQL Server instance
Then press Connect

Now you will see the window of the program where you can control and manage
all the databases on this instance
all the databases on this instance

The second step in the practice is to create the DataBase and create its own user

The second step is divided into three stages:
Now the first stage is to create the DataBase and
we will choose its name for ex: ”TestDB”
Now the first stage is to create the DataBase and
we will choose its name for ex: ”TestDB”

Open the SQL Management Studio icon as we have just opened before
and as shown in this image
and as shown in this image

Choose the same data as viewed here and click Connect

Now you will see the name of the SQL server instance,
as shown here, under which all these folders are located and
through which you can control the DB Server
as shown here, under which all these folders are located and
through which you can control the DB Server

Click the + sign next to the Databases folder as here
Then you will see the contents of this folder and you will find
another folder called System Databases which is created automatically
and contains within four databases as in the form here and
they are used to carry the files and settings of the current “sqlexpress” instance
another folder called System Databases which is created automatically
and contains within four databases as in the form here and
they are used to carry the files and settings of the current “sqlexpress” instance

Now right-click on the DataBases folder and select “New Database”

Above, we will write the name of the DataBase in our example here: TestDB
Then you’ll see the owner field, which means the user who owns this database
or the DB Owner, and we will leave it on the default because we will create it then,
or the DB Owner, and we will leave it on the default because we will create it then,
And next, you will see here the DataBase files you create.
There are two files are created as shown. The first file “TestDB” is containing
the data files themselves,, and the second file (TestDB_log) contains
the logs and events that occur in this database, such as
inserting, editing or deleting a new data,
There are two files are created as shown. The first file “TestDB” is containing
the data files themselves,, and the second file (TestDB_log) contains
the logs and events that occur in this database, such as
inserting, editing or deleting a new data,

If we move the Scroll here to the middle, we will find
the path of the folders of these two files, and from these two boxes
we can change their path on the server or leave them on their default
the path of the folders of these two files, and from these two boxes
we can change their path on the server or leave them on their default

If we choose the second selection “Options” from the left,
we will find here important settings related to this database,
but we will leave it as it is because we do not need to change it now
we will find here important settings related to this database,
but we will leave it as it is because we do not need to change it now

In the third selection from the left: Filegroups
You will find the name of the collection file that contains
this DataBase and it’s by default associated with the filegroup “PRIMARY” as shown here.
this DataBase and it’s by default associated with the filegroup “PRIMARY” as shown here.
From Add Here, we can add a new group name and add this database to,
Note that: Filegroups are the groups for organization and ease of database
control especially when there are a large number of them
Note that: Filegroups are the groups for organization and ease of database
control especially when there are a large number of them
And here we will leave it as it.

Now go back to the first choice on the left “General” and then
press OK to complete the DB creation
press OK to complete the DB creation

Now you will notice the emergence of the DataBase that
we’ve created here under the DataBases folder which named “”TestDB
we’ve created here under the DataBases folder which named “”TestDB

Stage 2: Create a User for this DataBase and chose its name for ex: “TestUser”
We note that any databases created for a particular site or
application must have their own user and have permissions on them
application must have their own user and have permissions on them

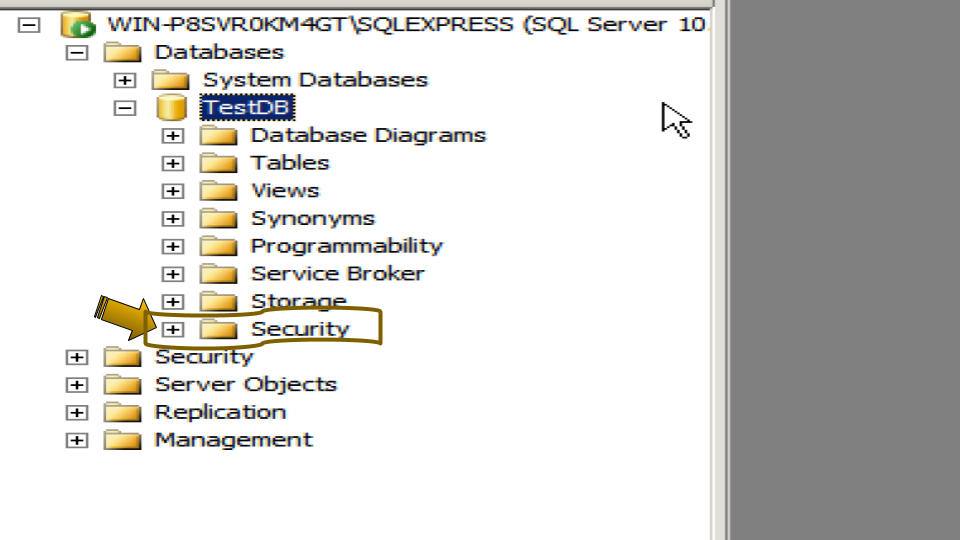
Goto the second folder which is the “security” folder and Click on the + sign next to it

Under the Security folder, you will find another folder named “Logins”,
so Click the + sign next to it
so Click the + sign next to it

Under this folder, you will find a group of users that are created automatically
when the DB server is installed
when the DB server is installed
And each user has a specific role in running the SQL server program in general,
and the most important users here are the sa and Administrator as in the form here,
and "sa" is the user that we created during the installation of the SQL Server,
which has all the permissions on the database server, and the user Administrator
Is the user of the version of Windows that we are working on now, which we have added
as a user who can log on the SQL server instance.

Now right-click on the Logins folder and select
New Login to create a new user
New Login to create a new user

First, enter the username. In our example, we will type TestUser,
and then choose the login method for this user to be
the second type SQL Server Authentication, ie it will be entered by the
users of the SQL program and not Windows users, and then write
the password for this user and should be With a complicated password
and then choose the login method for this user to be
the second type SQL Server Authentication, ie it will be entered by the
users of the SQL program and not Windows users, and then write
the password for this user and should be With a complicated password
, And then make sure that there is no mark next to “Enforce Password expiration”
so that this password does not expire after a certain period, and then choose the name of the database which will be found in the default and here we will choose “TestDB”
so that this password does not expire after a certain period, and then choose the name of the database which will be found in the default and here we will choose “TestDB”

When you click on the second choice on the left that’s: Server Roles
You’ll find here the user's privileges on the entire DataBase server, and we will leave it on the default mode, which is “Public”
This means that: this user will be able to see all the databases on this SQL instance, but he can only control his own databases

Now click on the third selection from the left, “User Mapping”, and then put a sign in front of the DataBase “TestDB” that will be owned by this user, and then below select the type of user validity on this database to be “db_owner”

Click on the fourth selection “Securables,. From this option, you can add any new user and give him a certain authority given by this user “Testuser”, where you can click on “Search” button from here and look for the username you want

Here, you can find the username that you want, and then
select it with your mouse, then go to the window below
to determine the type of validity you want to give him,
for example, from “Grant here”: you Can grant him
the power of altering, control, and others and From With Grant you can
give him the ability to grant his privileges to other users,
and “Deny” to prevent him from certain authority

Now click on the last option, “Status”, and you will find
the status of this user, such as to allow him
or to prevent him from connecting to the Database Server
the status of this user, such as to allow him
or to prevent him from connecting to the Database Server
Also to make him enabled or disabled
Finally, you press OK to create this user

Make sure that the username you created appears
as the name “TestUser” under the Logins folder
as the name “TestUser” under the Logins folder
Which is located under Folder “Security” on the entire DataBase Server

Now we will assure that this user has already been given permissions on the DataBase
“TestDB” by clicking on the + sign next to the DataBase name as shown
“TestDB” by clicking on the + sign next to the DataBase name as shown

After that, click on the + sign next to the security folder under the “TestDB” folder,
and note that for each Database there is a folder called “Security”,
and this other than the general security folder of the all database server instance
which any new user must be created on firstly.
and note that for each Database there is a folder called “Security”,
and this other than the general security folder of the all database server instance
which any new user must be created on firstly.
Now click the + sign next to the Users folder

Make sure the “TestUser” username appears as shown here

And now the third stage, Test Logging with this user (TestUser)

Click on the sign next to the name of the SQL server instance to become +,
And this is for trying to enter the same SQL server instance
but with the new user we have created
And this is for trying to enter the same SQL server instance
but with the new user we have created

Click the up arrow next to “Connect” and choose Database Engine

In the server name above you will leave it as default to enter
the same database server instance “SQlExpress” on the same server you are on,
then in the Authentication, choose SQL Server Authentication
the same database server instance “SQlExpress” on the same server you are on,
then in the Authentication, choose SQL Server Authentication
Then type the username “TestUser” and his password, and then press Connect

Now you will find a new line that expresses the same “SQLExpress”
Instance but logging by the new user
Instance but logging by the new user
And so, click the + sign next to the Databases folder

And make sure that there is the “TestDB” DataBase, also note that:
this user can see all the databases contained in this database instance,
but does not have the ability to add, modify or delete except only for his DB “TestDB”
because he is its owner.
this user can see all the databases contained in this database instance,
but does not have the ability to add, modify or delete except only for his DB “TestDB”
because he is its owner.

Thus the end of the ninth lesson
I wish it was helpful to all. When you have any questions or inquiries,
you can contact me by e-mail or social networking pages or by writing a comment. Inshaallah, The links will be in the description of the video.
you can contact me by e-mail or social networking pages or by writing a comment. Inshaallah, The links will be in the description of the video.
In the next lesson, God willing, we will talk about server control Panels
Peace, mercy, and blessings of Allah be upon you


No comments:
Post a Comment