


In the name of Allah the gracious the merciful

Peace be upon you
Welcome to lesson 4 in
The Server Admin Course
I'm Mohamed Elnmr from SystemAC Blog & channel
This lesson is: DNS server

The content of this lesson
We will discuss the following points
1- what is the DNS server
2- how does any server become a DNS server
3- DNS server most popular application types
The practical part
We will take
1- how to set up the DNS server
2- making a test by creating a domain and IP for it
3- verifying from that

Point 1: what is the DNS server?
It's a server that resolves domain names into IPs and vice versa
For instance, when you type "google.com" in your browser
So, your computer then asks the DNS server associated with
about this domain IP
The DNS server replies by 74.125.29.101
After that, you can access the Google website by this IP
So, there is a big relation between the domain name and the IP

so when you type: www.google.com
you will visit the google web page
Also when you type the IP you'll visit the same page

Point 2: how does any server become a DNS server?
when we install any DNS server application on this server

Point 3: DNS server most popular application types
In Linux system: there is Bind8
In windows system, there is the DNS role of Microsoft company

Now the practical part
We will see
1- how to set up the DNS server
We chose here the DNS role of Microsoft company
2- making a test by creating a domain zone and IP
3- verifying from that

1- Installing the DNS server on windows server 2008 R2

Open the server manager
by double-click on this icon

Select Roles from the left-side
Then click on Add Roles

Now click next

Select the DNS server
Then click next

Click next again

After that click on install

The installation will be proceeding with you now

When the word "Installation succeeded" appears with you
Then click close

Now open the DNS manager
By typing "DNS" in the start button
Then click on the DNS icon as shown here

This is the final step
the DNS role is ready for use

No.2 in practical
Creating a domain zone and IP
Here we will choose for example
domain: test1.com
Server IP: 192.168.1.12
We'll add three records
1- test1.com
2- www.test1.com
3- anything.test1.com

First: open the DNS server manager icon
As we mentioned before

Now: double-click on forward lookup zones
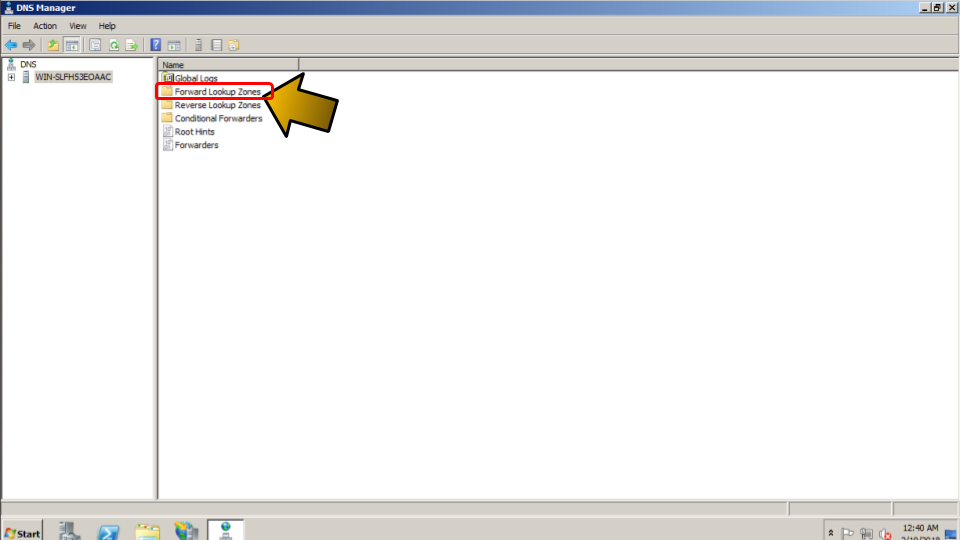
After that: right-click on forward lookup zones
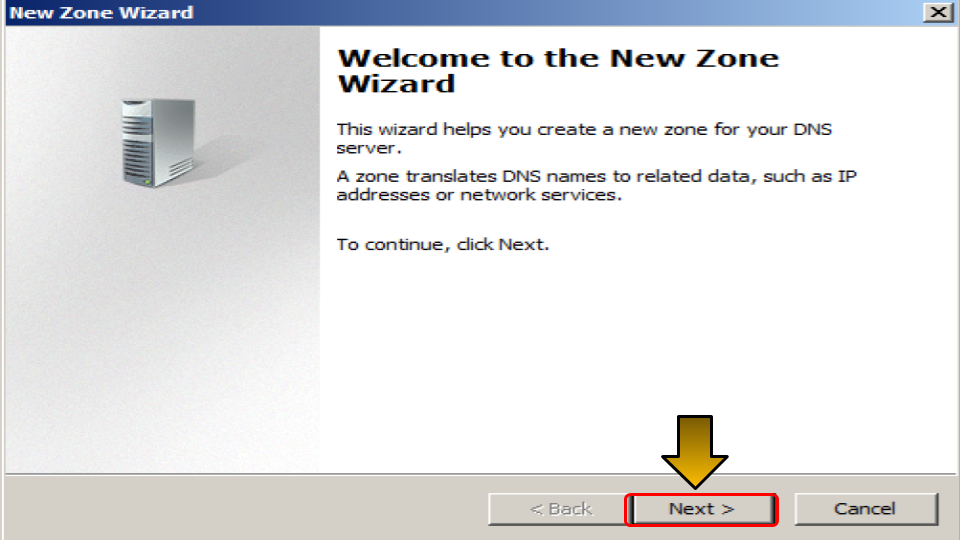
Then choose New Zone as shown here

Now click next
Make sure: it's on "Primary Zone"
Then click next

Type the zone name
Here: test1.com
Then press next

Let this setting as default as here
Then press next

Also, let it as default as shown here
Then press next

Now: double-click on the zone name
That we've created

Now: creating the records
right-click on the domain"test1.com"
And choose "New Host A or AAAA"

Now: creating the first record(test1.com)
let it as blank as shown here
Then write the IP here
Then click on Add Host

Now press OK

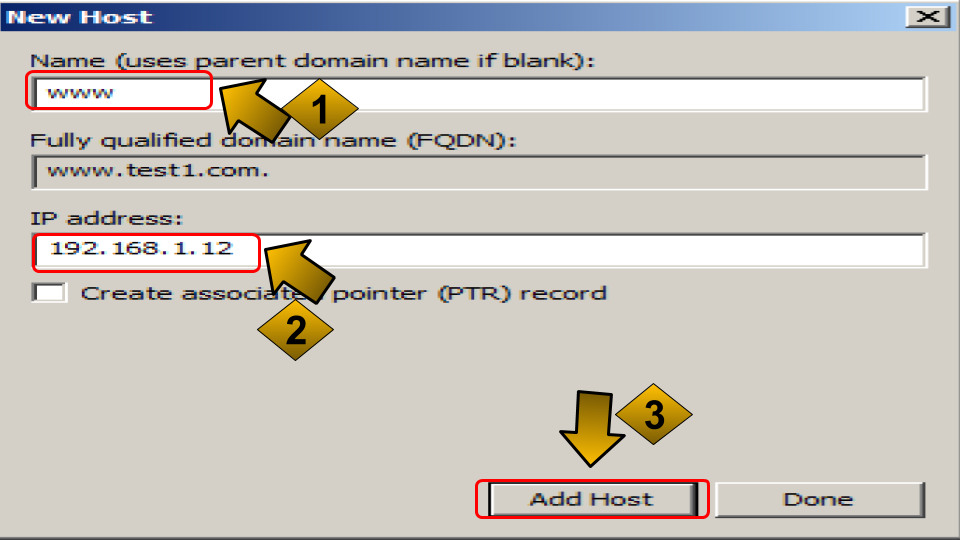
Now: the second record(www.test1.com)
Type here: www
Then type the address here
Then click on Add Host
Now: the last record(anything.test1.com)
Here type "*" that means anything
Then type the IP address
Then click on Add Host

After finished, click done

The three records that we've created
Will appear with you as shown here

No.3- verifying from that
We'll divide it into 2 stages

Stage1:
on any windows machine:
Make your DNS on your machine point to
the DNS server that we've created

On your machine: open the Run window as shown here
By clicking on start, then type "run"
After that double-click on the run icon

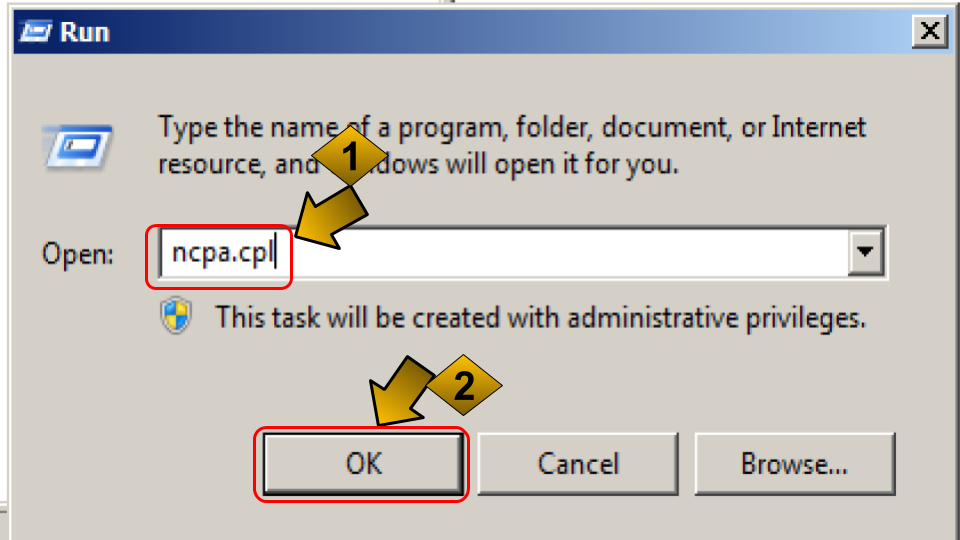
After that: open the network interface
By typing this command "ncpa.cpl"
Then click on OK
Then right-click on the local area connection
Then choose properties

Then double-click on the internet protocol version 4
As shown here

Type the IP address of the server
That we've installed the DNS role on it
Here for our example, that's 192.168.1.12
Then press OK

Stage2: testing the domain "test1.com" that we've created

Open the cmd console by typing "cmd"
After clicking on the start button
Then click on the cmd icon as shown here

Now: type this command "ping test1.com"

Make sure that: it's replying from the same IP
that we've created and we've added in the record
In the DNS role as shown here

Now: testing the second record
type: ping www.test1.com
Make sure: that's replying from the same IP
As shown here

Now: testing the third record
that was anything.test1.com
We typed here anything such as:
qqqqq.test1.com
Also, make sure it's replying from the same IP

This is the end of lesson 4
I wish it was useful
For any questions or inquiries
kindly contact me
Through the social links
Or type your comment
I will reply to you as soon as possible
In the next lesson InshaAllah
We will talk about the FTP server
Peace be upon you


No comments:
Post a Comment